My personal blog around GNU/Linux

Today I got an opportunity to participate in a live television show in a local cable network organized by Pondicherry Science Forum as a part of celebrating ‘World Book Reading Week’.

Along with me was Murugavel, one of the secretary of PSF. The objective of this live show was to talk about Books in Digital Era. It’s an 1 hour show. So the talk was around Ebooks, the open formats, DRM (Digital Restriction Management), Ebooks Store, Market Monopoly / Oligopoly, Publishing Industry, Open Access, Creative Commons, etc.,

Viewers can also make a call through telephone to interact with us. We received a total of 6 calls throughout the hour. One such question was from a medical student who is doing her final year project and wanted access for previously published research journals and papers. She wanted Free access for those papers.

Another caller asked us whether downloading and reading an ebook from Internet would create any issue of copyright violation.

These questions only reflects what the society needs or that the so called ‘Free market’ is slowing becoming obsolete in the age of Digital Commons. Though the market has put these devices into the hands of people, but the industry still holds the control for distribution / access of knowledge.

While the society is striving for freedom of knowledge, the market is in the opposite direction. Let us try to push it further for afford-ability too. It is only possible through Free Culture.

Right from the day Karl Marx and Friedrich Engels released their hard work as a Manifesto, it has become an important strategy for any movement to come up with an manifesto. Here I am trying to draft my digital resolution manifesto, where by I will try to stick with the principles mentioned here. Will be adding new resolutions as days passes by.

  1. Using Free Software to complete my tasks as far as possible.
  2. Seeding the Torrents whenever connected to Internet.

I was representing PuduvaiGLUG as a volunteer last year for FSFTN Summer Camp 2013. Things changed faster. I have become the part of FSFTN and this year I was observing the entire event.

FSFTN Summer camp is a 5 day hands-on event, where in participants would get introduced to Free Software Philosophy with various Free Software technologies, programming languages and tools. The ultimate aim was to bring people together to work as a team & encourage them to think about social issues via Free Culture philosophy.

I always credit Free Software Foundation TamilNadu (FSFTN) for not just sticking with Technology alone, but taking up social issues and applying technology wherever possible. They also promote Free culture way of living, not just Free Software and that is what makes them special and unique from other tech related groups in and around TamilNadu (mostly Chennai).

My part this year was to customize LinuxMint 17 iso image with packages and tools required for the sessions planned for the camp, so that they can be distributed to the participants to either live boot or to use it in a Hypervisor like Virtualbox. Around 150+ (including participants, volunteers and organizers) have attended the Camp. IIT-M GLUG helped FSFTN to get venue at IIT-M.

Following was the agenda for this year.

Day – 1

  • Philosophy of Free Software by Sibi (Secretary, FSFTN).
  • Introduction to Linux as Kernel; Installation; Shell commands – Yogesh (Core member, FSFTN).

Day – 2

  • Getting started with Ruby programming language – Vysakh (Freelancer, Rails enthusiast) & Harishankar (Member of CEGLUG).
  • Introduction to Version Control System with Git – Vysakh( ^^ ) & Harishankar ( ^^ ).

Day – 3

  • Bootstrapping with Ruby on Rails – Vysakh ( ^^ ) & Harishankar ( ^^ ).
  • Participants were given exercises to build a Campaigning site as a team using Rails focusing on social issues like Violence against Women, Communal tensions, Manual Scavenging, Internet Censorship, Patent Trolls, etc.,

Day – 4

  • Render with Blender – Vignesh (2nd year students from Sairam Institue of Technology). I have to admit, this guy rocked with his session.
  • Cloud computing – Yogesh. He has got 3+ years working in cloud platform & also one of the organizer of OpenStack Chennai Group.

Day – 5

  • Android Application development by Khaleel (Core member, Villupurm GLUG). Khaleel is an young & energetic boy who has the capability to handle a huge crowd with his technical & speaking skills.
  • Presentation of the Campaign Site built by the Teams on Social issues.

At the end of 5 days, each and everyone including Organizers, volunteers and participants had a very good experience both in terms of learning technology, philosophy and human relationships. After all without human touch, technology is worth nothing, that is the core idea of Free Software and Free Culture where in people are put in focus. It’s a people movement.

If I say everything went smoother, I am lying. There were lot of technical issues, which we have listed out to be prevented for next Summer Camp 2015.

I end my post with one of the Testimonial / Feedback that came back to us by one of the participant of the Summer Camp.

Your workshop was like no other I've attended...I liked the experience very
much...I wish to come back to it and learn more...ruby & rails was good...I
would like to get to know python also...looking forward to more learning
experiences from your organization...

Volunteers were very helpful n i would like to render the same help to
others. Thank you for this opportunity. -- Bertilla Theodore

This is a continuation of my previous post, where I just had my hands on with Python-Arduino-Proto-API-V2.

As I have mentioned at the end of my last post, I wanted to take a look into the prototype.pde file and arduino.py file to understand what exactly is happening and what data are being transmitted.

From my understanding this is how it works.

All the Arduino boards have Serial interface which communicates via pin 0 (Rx – pin for receiving data) and pin 1 (Tx – pin for transmitting data). Arduino IDE has with it a built-in Serial Monitor. Now taking advantage of this built-in Serial library of Arduino IDE, the Prototype.pde file has been written.

Taking a look at setup method in the prototype.pde file, which initializes the Serial interface on the board & taking a look at loop method where switch case is used with options ranging from 0 to 4 used for Reading and writing to Digital and Analog pins. Now that this pde file which is also called as Sketch is uploaded to the board using Arduino IDE will now be listening for the inputs on the Serial interface pin 0 (Rx) mentioned above, based on the choice supplied to the switch case the board will serve the purpose.

Let us now take a look into the arduino.py file which serves as an Python API that communicates with the prototype.pde file in the board. Python also has a Serial interface library called as PySerial. arduino.py uses this python library to talk with the serial interface on the board.

setLow, setHigh, getState, analogWrite, analogRead are the methods defined in the Arduino class which are mapped to Switch case 0,1,2 & 3 on the prototype.pde file which in turn uses the built-in Serial functions of Arduino to achieve the same.

So the approach is pretty straight forward, we can also write our own sketch taking advantage of arduino’s built in serial library and upload to the board. This API looks decent to do basic operations on the board.

Python & Arduino -1

Since I have got my Freeduino (a cloned version of Arduino Duemilanove w/ ATmega328), I wanted to control it using my defacto programming language (Python).

I am an electronics novice / beginner. Electronics had always attracted me and continue to do so. My love towards playing with Software + Hardware is growing infinitely. They give us a physical sense, unlike Software that runs into an virtual environment.

I tried few basic examples of controlling the board using the Arduino IDE and their C like programming structure. These examples include, blinking the LED (Literally the Hello World), controlling the LED using a switch and then controlling the Color changing LEDs.

Arduino’s playground site has a list of Python interfacing libraries. I chose the Python Arduino Proto API-V2.

Requirements:

  • pyserial (sudo pip install pyserial)

The Procedure:

  1. Went to the Github repo.
  2. Cloned the repo using git.
  3. Connected the Freeduino board using USB interface.
  4. Started the Arduino IDE.
  5. Selected my board category and Serial Port.
  6. File -> Open -> (Navigate to the cloned repo and select the prototype.pde file).
  7. Verify and Upload this Prototype.pde sketch to the board.

Done. The device is now ready to accept instructions via Python serial interface.

Open the terminal and navigate to the cloned repository and cd into arduino directory where you will find arudino.py file. Take advantage of the python interpreter. I prefer using IPython, so I have invoked the interpreter (you can also carry this with default python interpreter). Try the below code to control the LED on pin 13 on the board.

from arduino import Arduino
b = Arduino(‘/dev/ttyUSB0’)

pin = 13  # set the pin number
b.output([pin])  # set the output on this pin number

b.setHigh(pin) # This is power on the LED
b.setLow(pin) # This is power off the LED

b.close() # closes the connection and the port.

Voila. It feels good. Really, really good. My next attempt is to understand the arduino.py file which actually uses the pyserial library to talk with the device and the prototype.pde file, which makes the device to serve python instructions.

I have been a python guy for almost a year. Learning it & loving it.Now wanted to get into web-development with Django, though initially started with Flask, to get better understanding of what goes under the hood.

While browsing through the internet came across certain sites which one might find useful to get started with Django.

  1. Djangoproject.com – Official website for Django which itself contains a very good documentation to get started with.
  2. Djangorocks.com – A site which helps to know facts behind Django and with snippets and tutorials along with.
  3. GettingStartedwithDjango.com – a site which takes the beginners getting started to advanced level.
  4. Djangopackages.com – List of almost all the available packages for web-development with  Django, categorized.
  5. Djangobook.com – Yet another wonderful Free online book.

So, what are you waiting for? Dive into Django now.

Bash – Sqlite3

Wanted to use a very light weight file based Database Engine and Sqlite3 was my 1st choice. I am making this post on basic commands on Sqlite3 for my anytime reference.

Installing

sudo apt-get install sqlite3

Starting and using Basic commands

  1. $sqlite3 db_name.db – creates a new db with the give name
  2. sqlite3>.databases – list the available databases
  3. sqlite3>.tables – list the existing tables inside the selected database
  4. sqlite3>.schema tablename – displays the structure of the table.
  5. sqlite3>create table tablename (field1 datatype, field2 datatype, etc…);
    Eg:- create table test(id INTEGER PRIMARY KEY AUTOINCREMENT, name CHAR(40));
  6. sqlite3>insert into tablename(fields) values(values);
    Eg:- insert into test(NULL,”Pras”); or
    insert into test(id,name) values(NULL,”Pras”);
  7. sqlite3>update tablename set fieldname=value where fieldname=value;
    Eg:- update test set name=”Prasanna” where name=”Pras”;
  8. sqlite3>select * from tablename;
    Eg:- select * from test; or
    select * from test where name=”Prasanna”;
  9. sqlite3>drop table test; – deletes my table even from the entry
  10. sqlite3>delete from tablename – deletes the values and schema of the table.
  11. sqlite3>.quit – Get out of sqlite shell prompt and return to Bash.


I have been exploring Python for some time and I wanted to create a Qr-code for some reason using Python. Here is how to create QR Images Using it.

Requirements

  1. Python 2.7
  2. python-qrcode library (available from Github.com)
    • Download the source code as zip file
    • Right Click and Extract here the Zip file
    • Open your terminal and navigate to the Extracted folder using ‘cd’ command
    • Then run ‘sudo python setup.py install‘ (Enter your password when prompted)

Code

  1. Open a new file
  2. Copy paste the below code.

#!/usr/bin/python2.7
import qrcode

data = raw_input(“Type something to create QRCode: “) #gets input from user to encode into qrcode
print “\n”

qr = qrcode.QRCode(version=1, error_correction=qrcode.constants.ERROR_CORRECT_L,box_size=10,border=4,) #initialize settings for Output Qrcode
qr.add_data(data) #adds the data to the qr cursor

qr.make(fit=True)
img = qr.make_image()

file_name = raw_input(“Name for the Output image file, just the name without any extension: “)
print “\n”
file_extension = raw_input(“What type of Image? (PNG/JPEG): “)
file_name = file_name+’.’+file_extension
image_file = open(file_name,’w+’) #will open the file, if file does not exist, it will be created and opened.

img.save(image_file,file_extension.upper()) #write qrcode encoded data to the image file.

image_file.close() #close the opened file handler.

3. Save the file with extension ‘.py’ and close the editor

4.  Right click the file -> Properties -> Permissions -> Allow executing file as program

5. Double click the file, and click on ‘Run on Terminal’

run


Execution & Output

  1. Type something to create QrCode: Enter any data here that should be encoded into the qrcode image
  2. Name for the Output image file, just the name without any extension: testing
  3. What type of Image? (PNG/JPEG): PNG or JPEG (type any one)

That’s it. The Program ends and you should see a testing.PNG or testing.JPEG file inside the same folder.

You can view it with any Image viewer, You can Scan the image using QRCode scanner app available for Smartphones (After all that is the purpose for today).

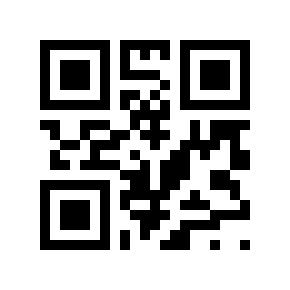
The sample Qr-code should look like this

test

TideSDK is an Open Source Software stack used to develop Cross-platfrom Desktop Applications using Web-technologies like HTML, JS, CSS, etc., We have number of toolkits to develop desktop applications like GTK, QT, etc., but there are always complexities involved.

Website:- http://tidesdk.org

1. Download TideSDK 1.3.1 beta and extract the content to ~/.tidesdk folder.

2. Download TideSDK Developer (a kind of IDE like thing which helps you to run, launch, package your apps)

You can get started from here http://tidesdk.multipart.net/docs/user-dev/generated/#!/guide/getting_started

Invitation to participate in Wiki Loves Monuments India 2012.